Replacing the drive belt
- The drive belt is a consumable part. Replace the drive belt if the speed of playback slows down or irregular rotation occurs. As a rule of thumb, we suggest replacing the belt once a year.
- Before replacing the drive belt, first disconnect the product’s AC adapter from the outlet.
-
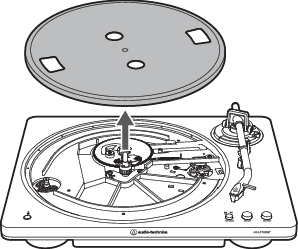
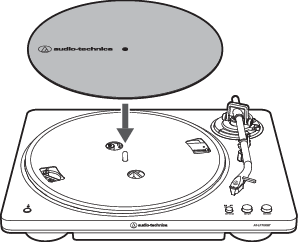
Remove the felt mat.

-
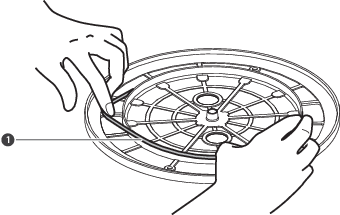
Remove the drive belt from the motor pulley (brass-colored), remove the platter, and then turn the platter over and remove the old drive belt.
- Place your thumbs in the openings and pull up strongly.
-
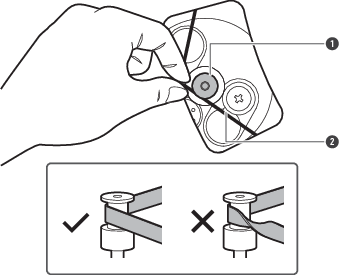
Place the new drive belt around the inner circle.
- Be careful not to twist the drive belt while doing this.
- Drive belt
-
Attach the platter.
- Align one of the openings with the position of the motor pulley (brass-colored).
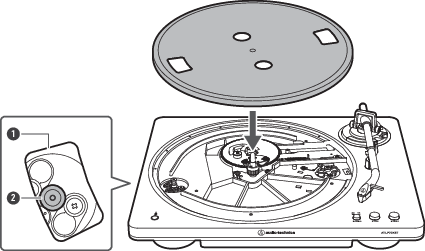
- Opening
- Motor pulley (brass-colored)
-
Place the drive belt on the motor pulley (brass-colored).
- Grasp the drive belt that was attached in step 3 and, while pulling it, place it on the motor pulley (brass-colored).
- Motor pulley (brass-colored)
- Drive belt
-
Set the felt mat on the platter.
-
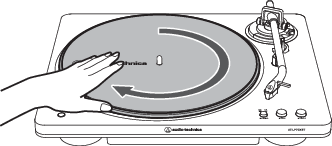
Release the tonearm rest clamp and lift the tonearm with the lift control lever. Slowly rotate the turntable ten times by hand in the direction of the arrow.
- You may want to hold the tonearm to prevent it from moving. This step is for resetting the auto mechanism, getting rid of any twists in the drive belt, and making sure the drive belt rides smoothly along the drive rim on the underside of the platter.