Cartridge
- Remove the stylus (replacement stylus) before installing the product.
- The product is extremely delicate. Handle it with sufficient care.
-
Mount the product onto the headshell or headshell-integrated tonearm.
- Temporarily tighten the screws.
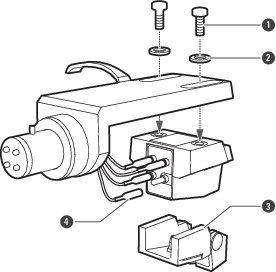
- Screw
- Washer
- Stylus (replacement stylus)
- Lead tip
-
Connect the lead tips, noting output polarity.
- Connect the headshell lead tips to the product output terminals (as shown in the figure).
- Never apply heat (from solder, etc.) to the output terminals.
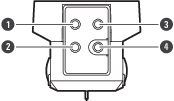
- White (left channel / +)
- Blue (left channel / −)
- Red (right channel / +)
- Green (right channel / −)
-
Determine the correct position for installing the product (adjust overhang).
- Adjust overhang following the instructions in the tonearm’s, turntable’s, or headshell’s user manual. If you are unsure, align the stylus tip to the cartridge originally attached to the tonearm (as shown in the figure).
- Finish tightening screws, making sure there is a balance between left and right.
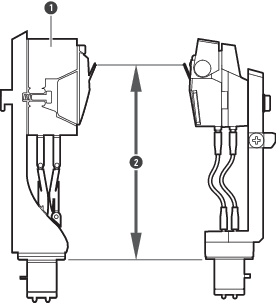
- Cartridge that came with the turntable
- Match this distance as closely as possible
-
Adjust tracking force.
- Confirm the tracking force for the product in Specifications.
- Make sure to use the product with the tracking force within the range shown in Specifications. Applying more tracking force than necessary may not only damage the record and stylus but impair audio quality.
-
Adjust tonearm height.
- Adjust the height so that the bottom surface of the headshell and the record surface are parallel, as seen from the side. An improper tonearm height may cause the body of the product to make contact with the record and could impair audio quality or damage the record.
- For subsequent steps, read the user manuals of the turntable.