Setting a Priority Zone
Adding a Priority Zone
Sound picked up in Priority Zones is output from Priority 1 to Priority 5 channels (CH2 to CH6).
- Priority channels are used for outputting audio for specific talkers from one channel.
- If all channels are in use, CH6 will be assigned as the Priority Zone.
- Up to 16 Priority Zones can be set for each microphone.
-
Select a microphone in the main area.
The microphone settings screen appears.
-
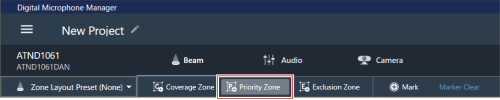
Click “Beam”.

-
Click “Priority Zone”.
- With each click, the mode for adding a Priority Zone is turned on/off.
- The mode for adding a Priority Zone can be turned off by right-clicking in the microphone pickup area or by pressing the Esc key on the keyboard.
The mode for adding a Priority Zone is turned on.
-
Add a Priority Zone by dragging it within the microphone pickup area.
- Priority Zones cannot be added outside the microphone pickup area.
- Priority Zones cannot overlap.
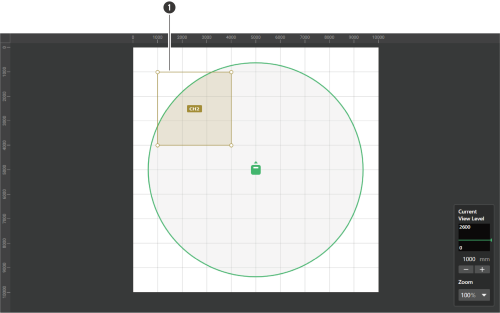
- Priority Zone
The added Priority Zone is selected and “Priority Zone” appears in the context panel.
-
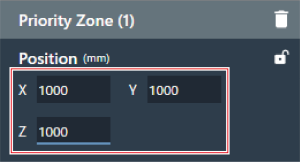
Adjust the position of the Priority Zone.
- Under “Position”, enter the height from the floor in “Z” and the position from the origin point using “X” (horizontal direction) and “Y” (vertical direction).
- In the main area, the Priority Zone can also be dragged to change its position.
-
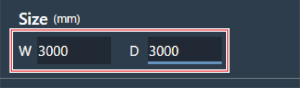
Adjust the size of the Priority Zone.
- Under “Size”, enter the size of the Priority Zone using “W” (Width) and “D” (Depth).
- In the main area, the point in the corner of the Priority Zone can also be dragged to resize the image.
|
|
|
|---|
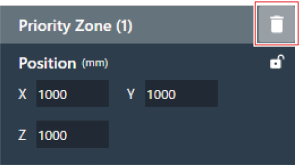
Deleting a Priority Zone
-
Select a Priority Zone in the main area.
“Priority Zone” appears in the context panel.
-
Click the trash icon or press the Delete key.
-
Click “OK” in the message.
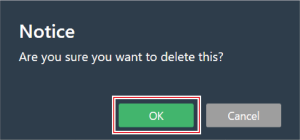
The Priority Zone is deleted.
Locking a Priority Zone
The Priority Zone is locked to prevent changes to its position and size.
-
Select a Priority Zone in the main area.
“Priority Zone” appears in the context panel.
-
Click the lock icon.
- With each click, the Priority Zone switches between locked and unlocked.
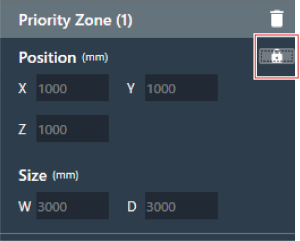
The Priority Zone is locked.
Changing audio output channels
Change the output channel assigned to the Priority Zone.
- Priority Zones can be assigned to channels CH2 to CH6.
- Multiple Priority Zones can be assigned to the same output channel. When doing so, assigned Priority Zones are covered with one beam (the beam will jump to the zone with the loudest human voice).
- Priority Zone audio output channels can be included in the CH1 output (Coverage Zone). This is useful when outputting the audio for an entire conference from one channel. In such applications, click the check box for “Include in Coverage Zone”. To use this function, the Coverage Zone must overlap the Priority Zone(s) that are intended to be sent to CH1 output. If the check box is not selected, the Priority Zone will be excluded from CH1 output (Coverage Zone).
-
Select a Priority Zone in the main area.
“Priority Zone” appears in the context panel.
-
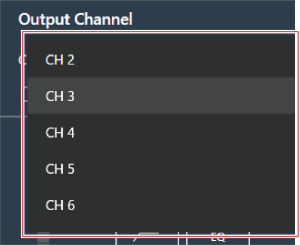
Click the area in the red box next to “CH” under “Output Channel”.
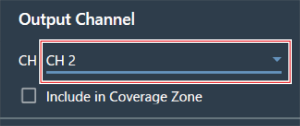
-
Select an audio output channel from the pull-down menu.
The audio output channel of the Priority Zone is changed.
Setting the audio input level for a Priority Zone
-
Select a Priority Zone in the main area.
“Priority Zone” appears in the context panel.
-
Set the audio input level for the Priority Zone.

- Shows the audio input level.
- Sets the input gain of the audio input. Adjust the gain by dragging (vertical direction) the meter.
- With each click, the low-cut of the audio input switches between ON (blue) and OFF (no color).
- With each click, the mute of the audio input switches between ON (blue) and OFF (no color).
- With each click, the 4-band EQ applied to the audio input switches between ON (blue) and OFF (no color).