Presets
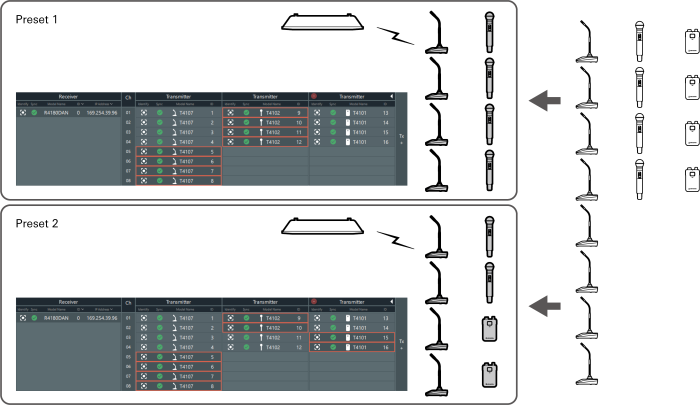
Among multiple transmitters that have been registered, you can specify one transmitter to link and save this as a preset.
- Presets are useful in that you can create one for each location or situation.
- The Mix Out setting is also saved to presets.
- When a preset has been recalled, you cannot link to transmitters that are not specified by this preset.
Creating a new preset/editing an existing preset
-
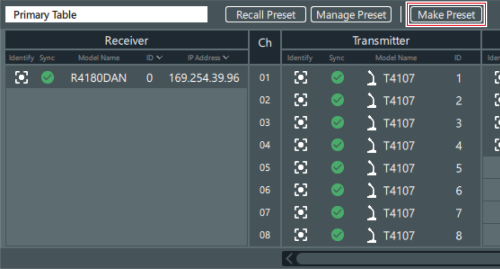
Click “Make Preset” on the “Link Configuration” screen.
- To edit the recalled preset, click “Edit Preset”.
-
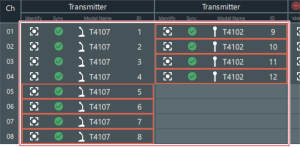
Select the transmitter for each channel to save in the preset.
- Red frames are displayed around the selected transmitters. You can select one transmitter for each channel.
- Click a selected transmitter to clear this selection.
-
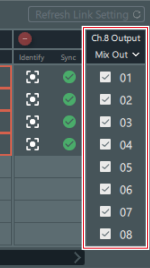
As necessary, set the mix out.
- Refer to Setting the mix out for details.
-
Click “Save As”.
- To overwrite the recalled preset, click “Save”.

-
Set the preset number and name on the “Save Preset” screen.
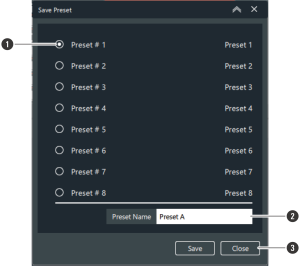
- Select the preset number to save.
- Enter the preset name.
- Closes the screen without saving the preset.
-
Click “Save”.
The preset is saved to the selected preset number.
Recalling a preset
Recall a saved preset.
-
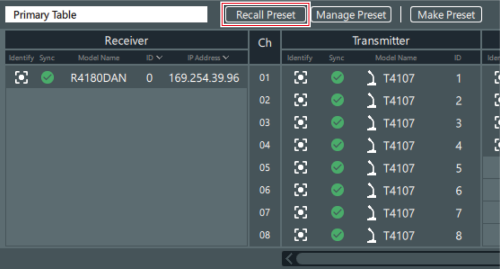
Click “Recall Preset” on the “Link Configuration” screen.
-
Select the preset to recall.
- If you will not recall a preset, select “Primary Table”.

-
Click “Apply”.
The selected preset is applied.
-
Click “Close” to close the “Recall Preset” screen.
Managing presets
Delete saved presets and change preset names.
-
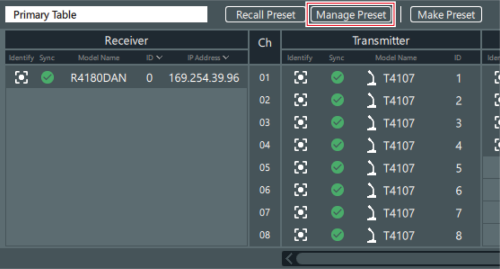
Click “Manage Preset” on the “Link Configuration” screen.
-
Delete presets and change preset names.
- The currently recalled preset cannot be deleted.
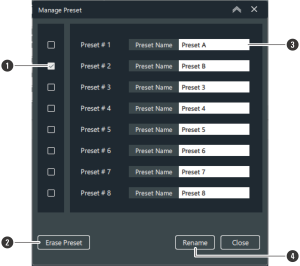
- Select the presets to delete.
- Deletes the selected presets.
- Enter the preset name.
- Applies the entered change to the preset name.
-
Click “Close” to close the “Manage Preset” screen.