Updating the Firmware
This document uses the AT2040USB as an example. Operation of the product is only required for the AT2020USB-XP. Perform the following procedure to update the firmware.
Note that the screen captures used below are for a Windows system.
-
Connect the product for which you want to update the firmware to the computer using the USB cable.
- For details on how to connect the product, refer to the user manual for the product.
- Make sure only one product to be updated is connected to the computer. If multiple products that can be updated are connected to the computer at the same time, USB Device Update Utility will not be able to detect the device, and an error will be displayed. For details, refer to If two or more devices are detected.
-
Start “USB Device Update Utility”.
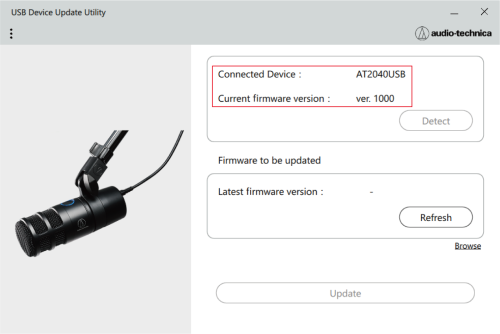
If the product to be updated is detected, details will be displayed in the “Connected Device” and “Current firmware version” fields.
-
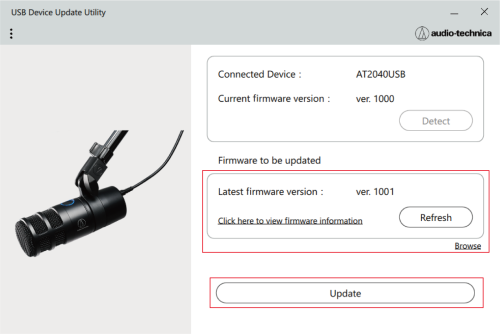
Make sure the latest firmware is displayed under “Firmware to be updated” and click “Update”.
- The latest firmware will be automatically retrieved from the server.
- If the version is not displayed, click "Refresh".
- If you want to update/downgrade the firmware using the downloaded firmware from our website, click "Browse".
-
Click “Run”.
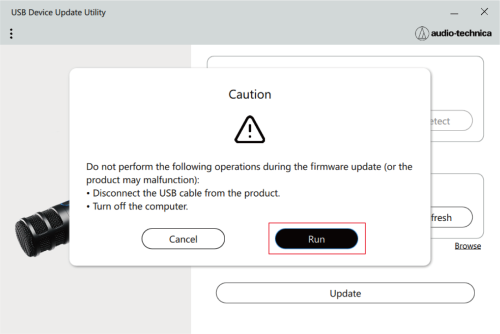
The firmware update will begin.
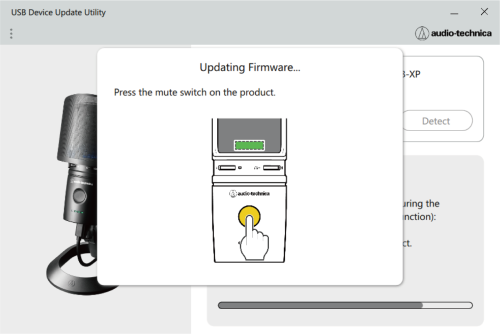
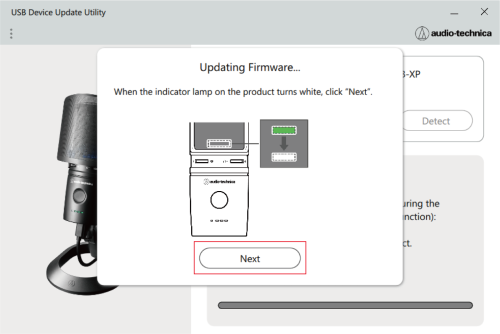
For AT2020USB-XP
Operating the product is required while updating. Follow the on-screen instructions and press the mute switch when necessary. When the indicator lamp on the product turns white, click “Next”. Be careful not to disconnect the product from the computer during operation.
-
Disconnect the USB cable from your PC, and then reconnect it and click “OK”.
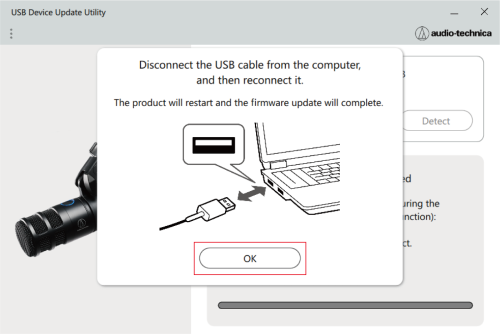
The product will restart and the firmware update will begin.
-
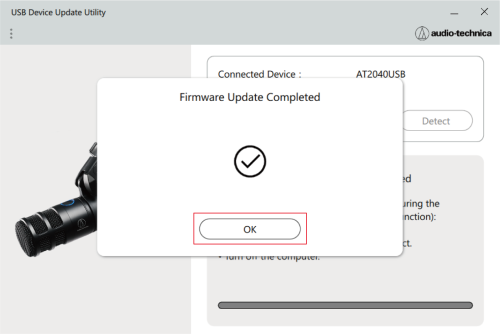
The following screen will be displayed when the firmware update is complete. Click “OK” to finish.
|
|
|
|---|